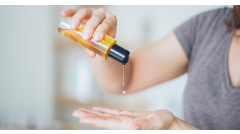
Looking for a natural way to give your hair the nourishment it craves? How about trying your hand at creating a DIY hair mask using castor oil, a powerful ingredient renowned for its ability to promote healthy hair and skin? This guide will take you through the simple steps of crafting a hair mask that not only revitalizes your locks but also adds a boost of moisture to your scalp.
Castor oil, with its rich composition, serves as a fantastic base for a hair mask, delivering essential fatty acids that promote hair growth and thickness. In just a few straightforward steps, you'll be creating a luxurious treatment that leaves your hair feeling rejuvenated and looking fabulous. Let’s dive right in and unleash the potential of this remarkable ingredient!

The Home Health Original Castor Oil is your go-to solution for promoting healthy hair and skin. This 32 fl oz bottle is packed with pure, cold-pressed castor oil that is Non-GMO, hexane-free, solvent-free, paraben-free, and vegan. Its rich composition makes it an excellent natural skin moisturizer while providing the essential nutrients needed for luscious hair growth. Perfect for DIY beauty treatments, this castor oil offers a simple yet effective way to achieve your skincare and haircare goals.
Gather Your Ingredients
Creating a DIY hair mask with Home Health Original Castor Oil requires a few carefully chosen ingredients that work harmoniously to nourish and hydrate your hair. Castor oil, known for its thick consistency and high ricinoleic acid content, is the primary ingredient that stimulates hair growth and scalp health. To craft the perfect hair mask, consider the following ingredients:
- Castor Oil: 2 tablespoons – This is the star of your mask that enriches your hair with moisture, reduces breakage, and supports a healthy scalp.
- Honey: 1 tablespoon – An excellent natural humectant that retains moisture, honey works to soften your hair and provide shine.
- Avocado: 1/2 ripe avocado – Packed with vitamins and fatty acids, avocado nourishes and hydrates, promoting elasticity in your hair strands.
- Essential Oils (optional): 5 drops – Oils like lavender, rosemary, or peppermint can invigorate the scalp and provide a pleasant fragrance while also offering additional benefits for hair health.
- Yogurt (optional): 1/4 cup – Rich in protein, yogurt strengthens hair and helps in managing frizz.
Gathering these ingredients presents a wonderful opportunity to personalize your hair mask according to your specific hair needs. Each component plays a vital role in ensuring your hair retains its natural beauty, shine, and health.
- Measuring tools (tablespoons, cups, etc.) for accurate quantities.
- A mixing bowl and whisk or fork to blend the ingredients until smooth.
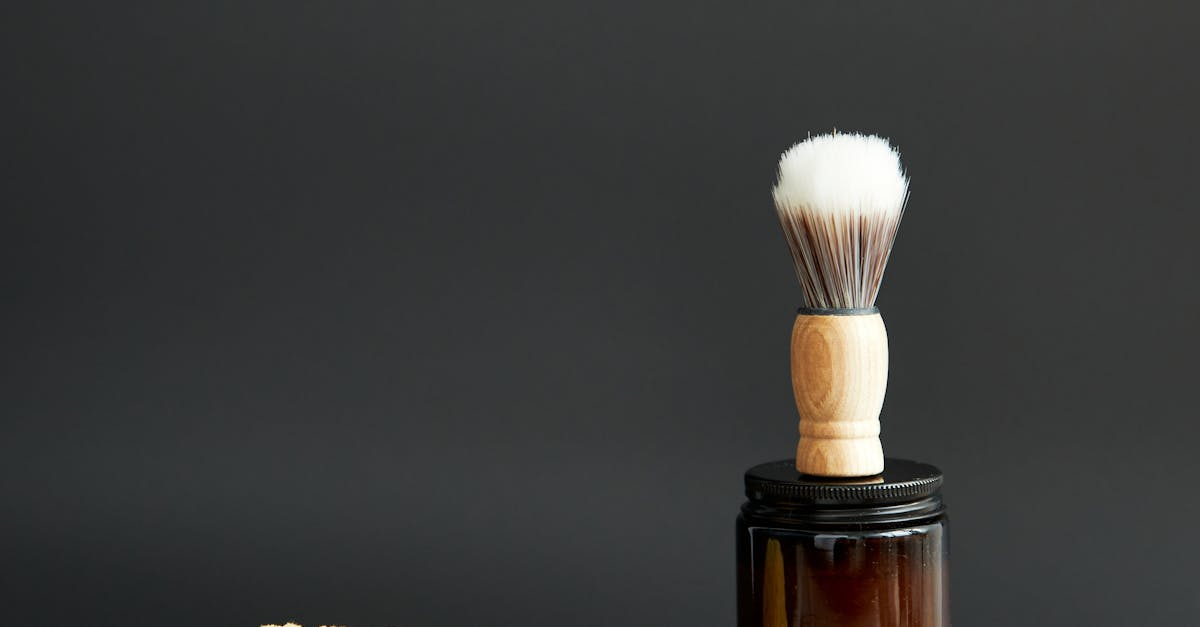
- A clean applicator brush for easy application on your hair.
Mixing Technique
Creating a DIY hair mask with Home Health Original Castor Oil is an exciting way to nourish your hair, and the mixing technique plays an essential role in achieving a smooth and effective mask. Start by gathering your key ingredients, which can include natural elements like honey, avocado, coconut oil, or yogurt, depending on your hair needs. Ensure you have a measuring cup, a mixing bowl, a whisk, or a blender ready for preparation.
Begin with measuring out the Home Health Original Castor Oil. A good starting point is to use about 2 tablespoons, which provides ample hydration without being too heavy. Pour the castor oil into the mixing bowl first, as it serves as the base of your mask. If you're using thicker ingredients such as mashed avocado or yogurt, add those next. For instance, if you’ve chosen avocado, slice it open, scoop the flesh into the bowl, and mash it with a fork until smooth. To achieve a uniform texture, combine the castor oil and mashed avocado with a whisk. If you prefer a creamier consistency, using a blender can be highly effective—just blend until creamy and well-combined. Next, you might want to incorporate any additional ingredients, such as honey for moisture or coconut oil for added shine. When adding these, ensure to mix them thoroughly into the base. This is important because each ingredient has unique properties that contribute to the nourishment of your hair. Always aim to whisk or blend thoroughly to avoid any lumps, which can make application difficult. Once everything is well-blended and you have a soft, creamy consistency, your hair mask is ready for application!
- Consider using warm water to slightly warm your coconut oil if it’s solid, making it easier to mix.
- Using a hand mixer can save time while ensuring a fluffy consistency.
Application Instructions
To achieve the best results with your DIY hair mask using Home Health Original Castor Oil, careful application is essential. Begin by preparing your workspace and gathering all necessary materials, including your castor oil, a mixing bowl, an applicator brush or your hands, and hair clips for sectioning. Depending on your hair type—whether it's straight, wavy, curly, thick, or thin—the amount of castor oil you'll need to use will differ. Generally, you'll want to use 1 to 3 tablespoons for short to medium-length hair and up to 5 tablespoons for longer, thicker locks. If you're unsure, start with a smaller quantity and add more as necessary. You can mix the castor oil with other beneficial ingredients like coconut oil or honey for added nutrients.
Before applying the mask, it's crucial to section your hair to ensure even distribution. Divide your hair into four sections, using hair clips to secure each part. This method allows better access and control as you apply the mask. If your hair is particularly thick or long, consider making additional sections. Use an applicator brush for precision, especially at the roots, or apply using your hands for a more intimate approach. Focus on the scalp to promote hair growth, gently massaging the oil into your roots. Afterward, apply more oil towards the ends, which often suffer the most from dryness and damage. It's advisable to saturate the ends well, ensuring they receive the maximum benefit from the nourishing properties of the castor oil.
- Section hair into four parts for easier application.
- Use a brush or hands to apply, focusing on the scalp and ends.
- Adjust the amount of product based on length and thickness.
- Saturate the ends thoroughly for deep conditioning.
Optimal Timing
When using Home Health Original Castor Oil to create a DIY hair mask, timing is essential for achieving optimal results. The recommended duration for leaving the mask on your hair is typically between 30 minutes to 2 hours. A minimum of 30 minutes allows the nourishing properties of castor oil to penetrate the hair shafts effectively, while up to 2 hours can enhance moisture retention and provide a deeper conditioning effect. For those with extremely dry or damaged hair, extending the mask duration can yield even better results.
To make this waiting period more enjoyable and effective, consider the following tips:
- Wrap your hair in a warm towel. The heat can help open up the hair cuticles, allowing the oil to absorb more deeply.
- Use a shower cap to keep the mask warm and create a mini steam treatment. This method can make the experience feel like a luxurious spa session.
- Indulge in a little self-care by reading a book or listening to soothing music while you wait, creating a relaxing environment.
- Engage in light stretches or meditation to enhance your overall wellness while the mask works its magic.
Rinsing Techniques
To effectively rinse out your DIY hair mask with Home Health Original Castor Oil, start by using warm water to help break down the oil and facilitate easier removal. Warm water helps to open up the hair follicles, allowing for better penetration of moisture while also making it simpler to wash away any excess product. Begin by thoroughly soaking your hair with warm water, ensuring that it’s evenly distributed. This initial step helps in loosening the castor oil from your strands.
After you have soaked your hair, apply a gentle, sulfate-free shampoo to your scalp. It’s essential to choose a product that cleanses without stripping the hair of its natural oils. Work the shampoo into your scalp and down the lengths of your hair, focusing on areas where you applied the hair mask. Rinse thoroughly, ensuring that all residues of the castor oil mask have been removed. If you notice any excess oil still present, you may want to follow up with an additional round of shampooing. For added softness and hydration, consider using a conditioner after rinsing out the mask, applying it mainly to the ends of your hair for the best results.
- Start with warm water to loosen the hair mask.
- Use gentle, sulfate-free shampoo to ensure no harsh chemicals damage the hair.
- Focus on the scalp and lengths while shampooing to remove all residue.
- Rinse thoroughly and repeat shampoo if necessary for a completely clean feel.
- Condition if desired, especially targeting the ends of the hair for extra moisture and nourishment.
Frequency of Use
Using a DIY hair mask featuring Home Health Original Castor Oil should be tailored to your hair type and specific needs. For individuals with dry or damaged hair, it is often beneficial to apply the mask once a week. The nourishing properties of castor oil deeply hydrate, helping to repair split ends and restore shine. On the other hand, if your hair is oily or fine, using the mask every two weeks might be more suitable to prevent your hair from becoming weighed down or greasy.
Signs that indicate a need for more frequent use include excessively frizzy hair, frequent tangles, or a dull appearance, which suggest that your hair may require additional moisture and nourishment. Conversely, if your hair feels heavy, is looking limp, or has an oily texture post-application, reducing the frequency may be needed. It's also crucial to consider your hair texture; for curly or coily hair types, using the mask weekly can enhance curl definition and moisture retention.
- Dry or damaged hair: Once a week
- Oily or fine hair: Every two weeks
- Curly or coily hair: Weekly for moisture and definition
Storage Tips
When creating a DIY hair mask using Home Health Original Castor Oil, it's essential to know how to store any excess mixture properly. To keep your hair mask fresh, transfer any leftover product into a clean, airtight container made of glass or high-quality plastic. Glass is ideal since it does not leach chemicals, preserving the integrity of the oils and other ingredients you included. Ensure the container is small enough to minimize air exposure once sealed.
Generally, an unopened DIY hair mask can be stored in the refrigerator for up to one week, assisting in preserving its effectiveness by slowing down the growth of bacteria. However, if you notice any changes in color, texture, or smell, it's best to discard the mixture immediately to avoid any unwanted side effects on your hair and scalp. Here are some quick storage tips to remember:
- Always use clean utensils when handling the mask to avoid contamination.
- Label the container with the date you made the mask to track its freshness.
- Keep the mask in a cool, dark place, away from direct sunlight, which can degrade its quality.
Related Products


Troubleshooting Common Issues
Using Home Health Original Castor Oil as part of your DIY hair mask can yield fantastic results, but you may encounter some issues along the way. Greasiness is a common concern; because castor oil is a heavy oil, it can leave your hair feeling overly oily if not properly managed. To address this, mix castor oil with lighter oils, such as jojoba or argan oil, which can balance out the moisture without adding unnecessary weight. Additionally, incorporating a few drops of essential oils like tea tree or lavender can enhance the mask's performance while also providing a pleasant fragrance
Difficulty rinsing out the mask can also occur, especially if too much castor oil is used. In such situations, consider applying a clarifying shampoo while your hair is dry to help break down the oil. Alternatively, you can use warm water to rinse out the mask before shampooing, as heat helps dissolve oils more effectively. If you find that your mask still doesn't rinse out easily, try following up with a conditioner that has a heavier consistency, making sure to thoroughly work it through your hair to help lift the oil.
- Mix with lighter oils to reduce greasiness.
- Use essential oils for enhanced performance.
- Apply clarifying shampoo to dry hair for easier removal.
- Use warm water before shampooing to dissolve oils.
- Follow up with a heavier conditioner for better rinsing.
Enhancing Hair Benefits
Creating a DIY hair mask using Home Health Original Castor Oil can transform your hair care routine by providing deep hydration and nourishment. This cold-pressed, non-GMO, and paraben-free oil is particularly beneficial for promoting hair health due to its rich composition of fatty acids. By incorporating additional natural ingredients, your homemade mask can address specific hair concerns and enhance its overall benefits. For instance, if you have dry or damaged hair, adding avocado oil can provide extra moisture and promote soft, manageable locks. Avocado oil is packed with vitamins A, D, and E, which help to penetrate the hair shaft and restore shine.
If you're looking for a boost in shine and vitality, consider mixing in argan oil. Known for its rich nutrient profile, argan oil can help improve hair elasticity, reduce frizz, and enhance smoothness. Alternatively, if volume and strength are your priorities, incorporating essential oils like rosemary or peppermint can stimulate scalp health and promote hair growth. These oils can invigorate the hair follicles, potentially leading to thicker and healthier hair. Mixing rosemary or peppermint with castor oil can create a powerhouse blend that revitalizes your scalp and strengthens hair.
- Avocado Oil: For added moisture and softness
- Argan Oil: To enhance shine and reduce frizz
- Rosemary Essential Oil: For improved scalp health and hair growth
- Peppermint Essential Oil: To invigorate the scalp and promote thickness
Post-Mask Care
After treating your hair with a DIY hair mask containing Home Health Original Castor Oil, it’s essential to focus on how to care for your tresses for lasting benefits. Firstly, consider your drying technique. Air drying is an excellent method to maintain moisture levels and reduce heat damage. Gently blot your hair with a soft towel to remove excess moisture without rubbing, which can lead to breakage. If you prefer heat styling, make sure to use a heat protectant product to shield your hair from potential damage. Look for options that specifically mention they care for colored or chemically treated hair if that's applicable to you.
In addition to drying techniques, follow-up treatments can significantly enhance the health of your hair post-mask. Incorporate a lightweight leave-in conditioner to help detangle and hydrate your hair. Using a natural oil like argan or jojoba oil can also provide extra nourishment, promoting shine and softness. Regular trims are beneficial as well, eliminating split ends and maintaining your hairstyle. To keep your hair in optimal condition, you might also want to consider using a silk or satin pillowcase, which reduces friction and helps maintain moisture while you sleep.
- Opt for an alcohol-free hairspray to tame flyaways.
- Your styling tools should be used sparingly to avoid heat-related damage.
- Reapply the castor oil periodically to keep your hair hydrated.
Why We Chose This Product
Choosing castor oil for your DIY hair mask was no coincidence; its remarkable properties make it an ideal choice for those aiming to enhance their hair care routine. The versatility and effectiveness of castor oil can transform lackluster hair into a vibrant mane that feels soft and healthy. Not only does it nourish your hair, but it also works wonders for your scalp, addressing dryness and flakes.
- Pure and cold-pressed for maximum effectiveness
- Non-GMO and vegan-friendly
- Hexane-free and paraben-free for a worry-free experience
- A natural moisturizer that penetrates deeply
By incorporating this natural wonder into your beauty regimen, you are opting for a safer and eco-friendly method to achieve the shiny, healthy hair of your dreams. So, grab that bottle of castor oil, and let’s get those creative juices flowing!
The Home Health Original Castor Oil is your go-to solution for promoting healthy hair and skin. This 32 fl oz bottle is packed with pure, cold-pressed castor oil that is Non-GMO, hexane-free, solvent-free, paraben-free, and vegan. Its rich composition makes it an excellent natural skin moisturizer while providing the essential nutrients needed for luscious hair growth. Perfect for DIY beauty treatments, this castor oil offers a simple yet effective way to achieve your skincare and haircare goals.